Getting Started with Smoothie AI: Your First Campaign in 5 Minutes
Part 1. Step-by-Step: Create Your First Product Visual
1. Open the Blender
Visit https://app.getsmoothie.ai/blender or access it from the app's sidebar
2. Upload Your Product
Navigate to the Asset Catalog (left sidebar) → Products tab, or upload directly in the Blender.
Do: Use clear, well-lit product photos
Do: Smartphone photos in natural light work great
Don't need: Professional photography or perfect backgrounds
Smoothie includes built-in background removal. The system analyzes your image and flags any issues automatically.
Note: We currently only support one image but will be introducing support for multiple angles for enhanced output. Accepts PNG, WebP, JPEG.
3. Choose Your Scene
Open the Scenes library from the Blender or visit https://app.getsmoothie.ai/assets/scenes.
Browse 100+ preset scenes:
- Filter by category (Studio, Lifestyle, Luxury, Outdoor, Seasonal)
- Filter by color scheme to match your brand
- Filter by style (minimal, vibrant, dramatic)
Create a custom scene:
- Click "Add Scene" → "Generate Scene"
- Write a short, focused prompt: "marble countertop with soft morning light"
- (Optional) Add a reference image if you want to match a specific style
Many scenes include placeholder objects — Smoothie will naturally replace these with your product.
4. Add a Model (Optional)
Visit https://app.getsmoothie.ai/assets/models to browse the model library.
Use models when:
- Showing lifestyle context (skincare in hand, jewelry on wrist)
- Demonstrating product use (holding a coffee cup, wearing sunglasses)
- Creating fashion or apparel shots
Skip models for:
- Furniture, home decor
- Products meant to stand alone
- Technical product shots
Remember: Scenes can include hands for product placement without full models.
5. Write Your Generation Prompt (Optional but Recommended)
Smoothie intelligently understands product placement even without prompts, but adding one helps you get exactly what you envision.
For best results, you can:
- Reference your product naturally ("my perfume" or "the bottle")
- Mention where in the scene you'd like it
- Note if you want to replace a placeholder object
- Add any mood or lighting preferences
Example prompts:
- "Replace the placeholder bottle with my perfume, position it on the marble vanity near the mirror, add soft morning light"
- "Place the watch on the model's left wrist, catching golden hour sunlight"
- "Put the handbag on the café table next to the coffee cup, natural afternoon lighting"
- Or simply: "Product on table with morning light"
Remember: Smoothie adapts to your style. Short but specific prompts work great too!
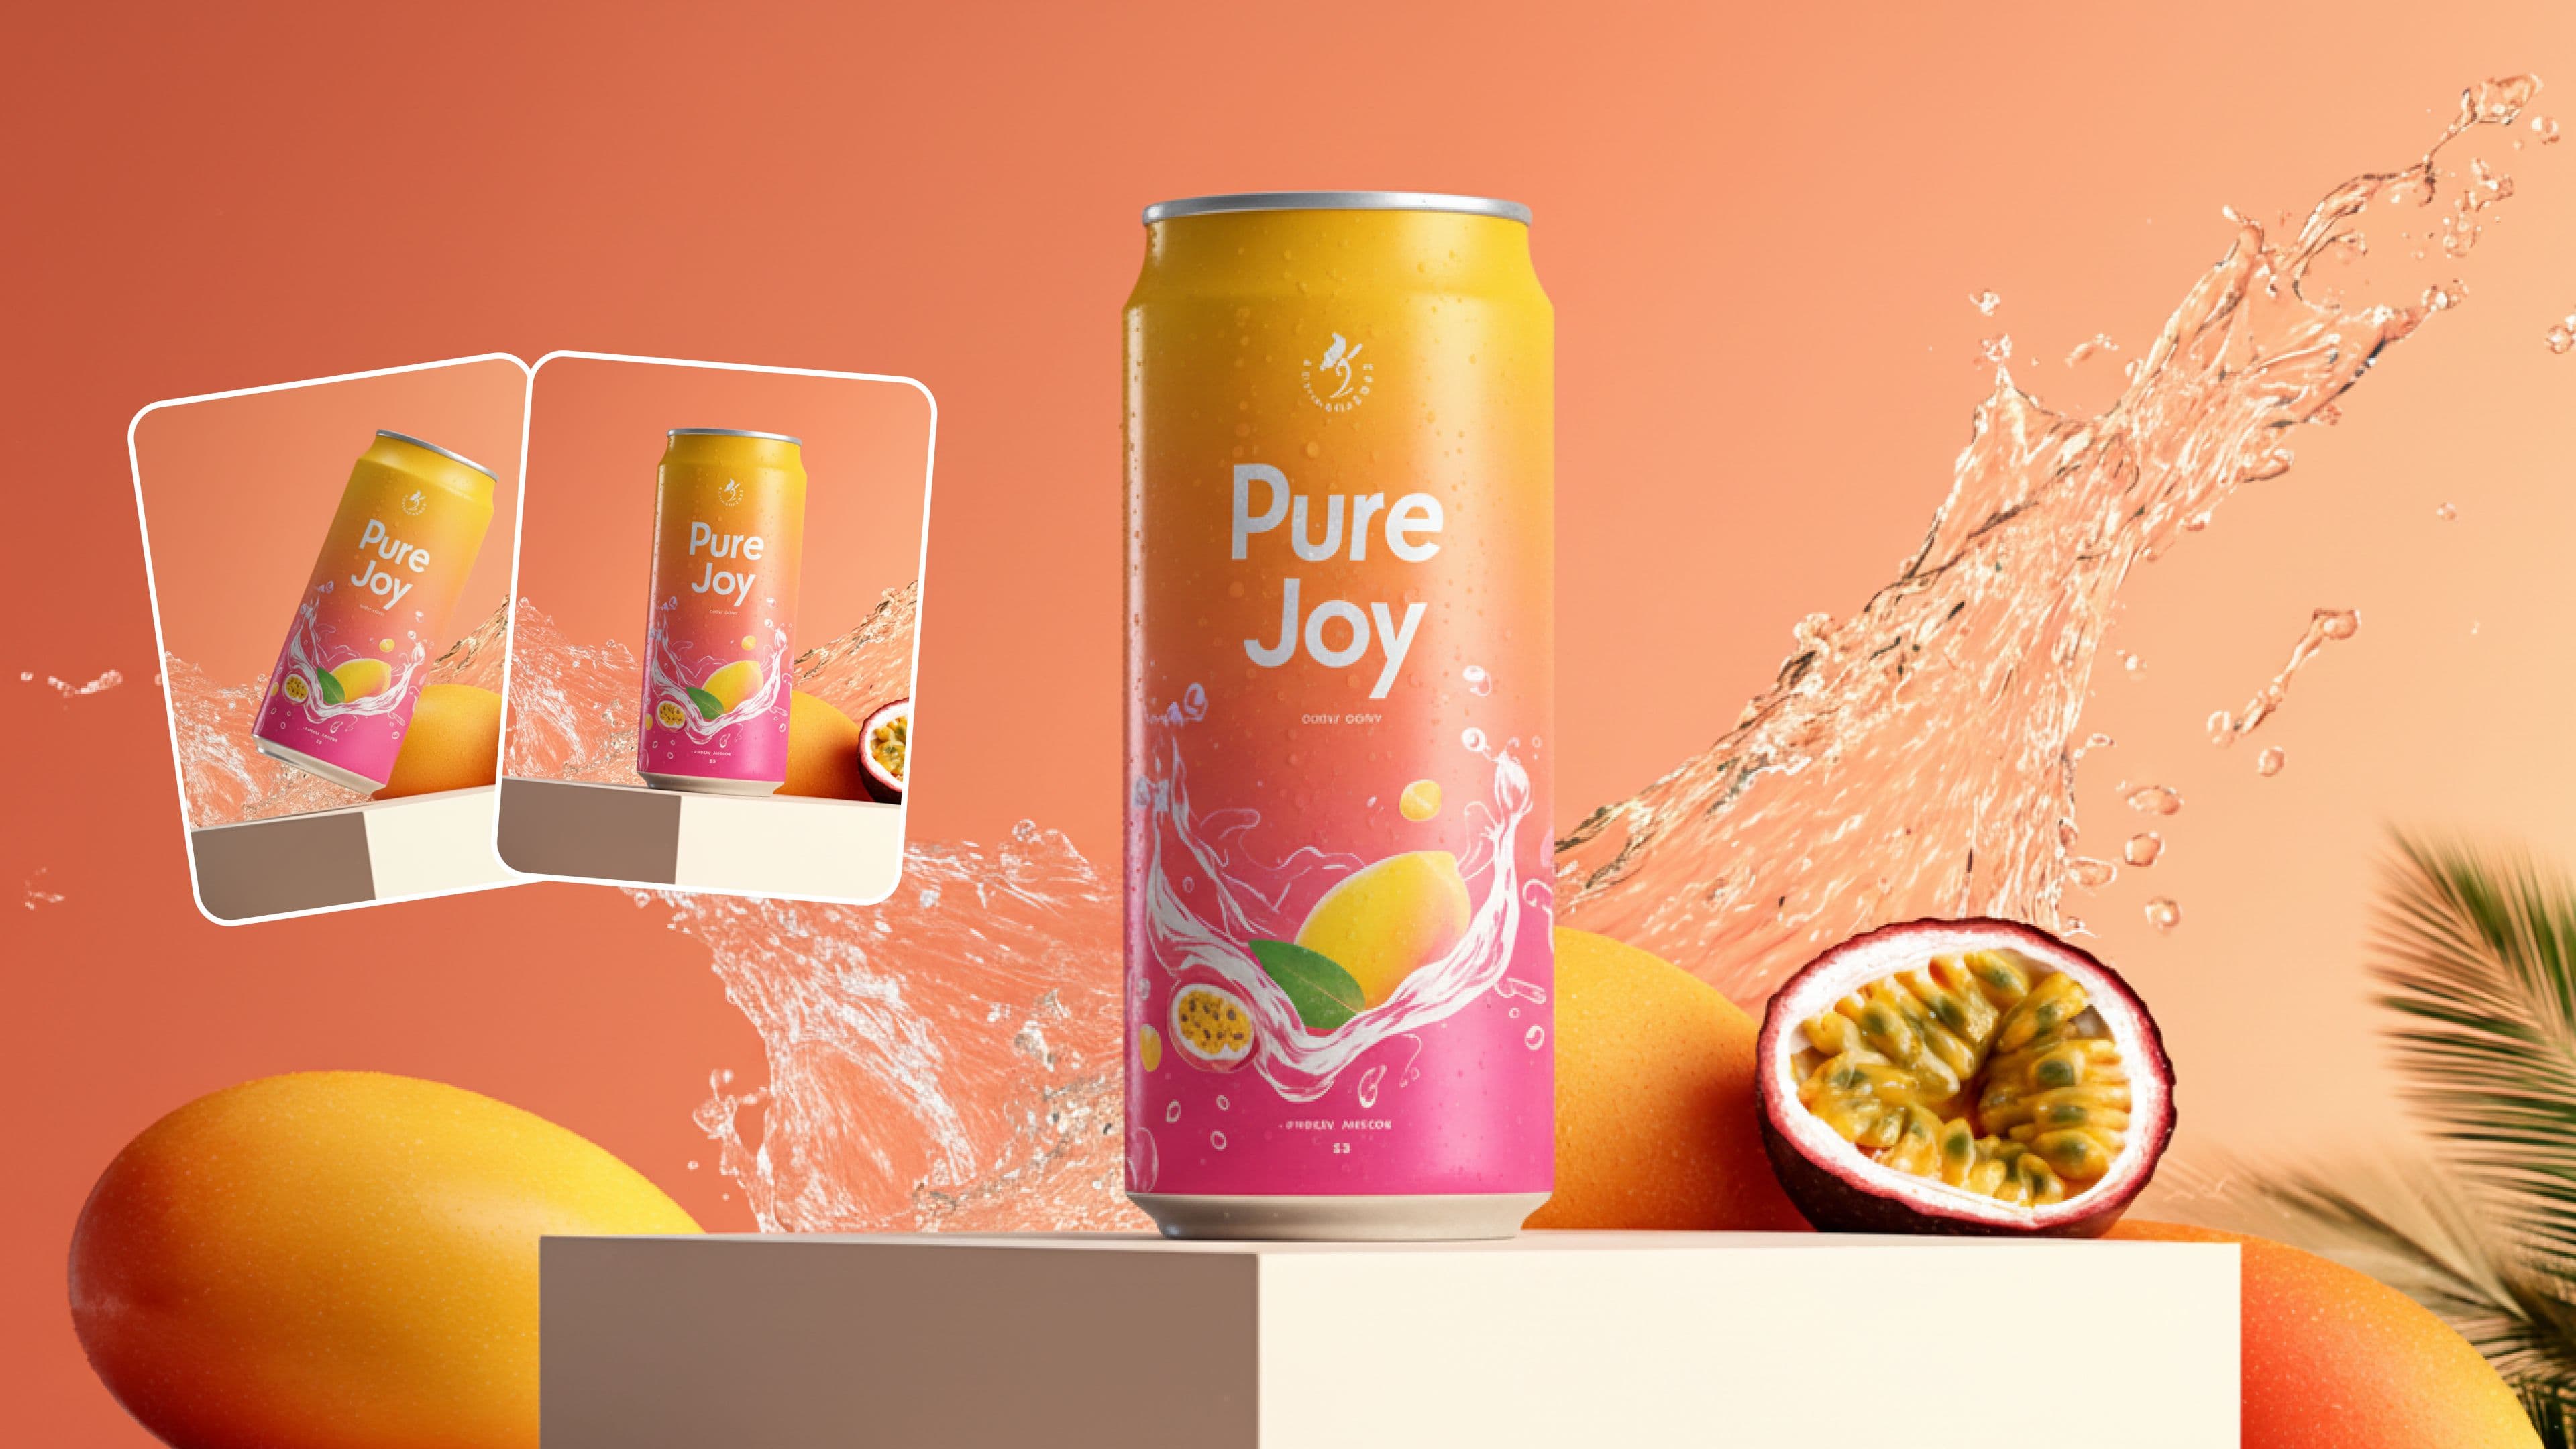
6. Generate Your First Visual
Hit Generate and you can expect Smoothie to whip up stunning visuals in under a minute. Smoothie understands product photography, so you'll often get campaign-ready assets on the first try.
It automatically blends your product into the scene, matching lighting, shadows, and perspective for natural, professional results.
7. Refine and Perfect
While many generations are ready to use immediately, Smoothie's refinement tool lets you perfect your vision. Since we maintain your context throughout the session, you can guide specific adjustments without starting over.
Refine one element at a time:
- "Move the product to model's other hand"
- "Add stronger shadows for depth"
- "Brighten the overall scene"
- "Change background to sunset lighting"
Pro feature: Add more products mid-session using the attachments menu during refinement. Add them one at a time for best results.
Every version is saved — you'll end up with multiple assets from a single session.
Part 2. Key Concepts to Remember
Sessions
- One main product per session (this is your hero item)
- Swap scenes freely within the same session
- Can't replace the base product — start a new session for different products
- All versions and branches are saved automatically
Smart Refinement Strategy
- Start with basic placement
- Adjust lighting and shadows
- Fine-tune product position
- Add supporting elements if needed
Export Options
- Full resolution for print campaigns
- Optimized sizes for social media
Part 3. Pro Tips for Best Results
Product photos: Natural light or studio light. Clean backgrounds aren't necessary, we remove them anyway.
Scene selection: Start with presets to understand the style, then experiment with custom scenes.
Prompting: Describe what you want, not what you don't want. "Bright and airy" works better than "not dark."
Efficiency: Batch similar products in one sitting while you're in the flow.
Examples of What to Create
- E-commerce: Clean product shots on colored backgrounds
- Lifestyle: Products in real-world settings with models
- Seasonal campaigns: Holiday themes, summer collections
- A/B testing: Multiple versions for performance testing
- Social content: Eye-catching shots for Instagram, TikTok
Perfect For
- E-commerce brands updating catalogs frequently
- Small businesses without photography budgets
- Creators needing consistent product content
- Agencies testing multiple creative directions
- Anyone selling products online
Wrapping Up
Smoothie AI puts professional product photography in your hands. No crew, no studio, no waiting. Just your products, beautifully presented, ready for any platform.
Start with simple shots, then experiment with our refinement tools. Within minutes, you'll be creating visuals that would traditionally take days and thousands of dollars.
Tag us when you post — we love seeing what you create! IG: @getsmoothie.ai
Stay fresh with Smoothie
AI insights, creative hacks, and marketing ideas-served fresh to your inbox.